

Camera-Drop 项目开坑记录
为何开坑这个项目
这是我这学期计网的课设项目之一:编写利用可见光传输信息的软件。我感觉这个项目挺有意思的,而且也有一定的应用价值,加上项目的思路并不难,且有学长的项目(Visual-Net)以及开源方案(如libcimbar、QR_Video(基于前者))可供参考,最重要的是我们是 teamwork + vibe coding,大家集思广益、齐心协力(翻译:有 AI 能用,有大腿能抱)应该能够解决项目中的各种困难。不管最后能不能做出一个合格的成品出来,中间的探索过程一定能学到不少东西的。
项目要求
- Encoder 将文件
in.bin编码为视频encoded.video; - User 拍摄屏幕上播放的
encoded.video,得到camera.video; - Decoder 将
camera.video还原为in.bin,并输出每位有效性标记文件vout.bin。
目标成果
以下是我的期望成果(和课设项目要求不太一致):
- 做出
Encoder和Decoder,实现尽可能高的传输速率。 % 的可靠性,保证用户正常使用时,能准确无误地传输目标文件( vout.bin可以省了)。- 具备实时性,发送端将文件编码为动图并显示,接收端打开摄像头即可接收,无需经历“拷回”过程。
项目思路
若从计网的角度看待这个项目,每帧图片就是一个数据包,我们所要实现的就是设计一个合理的光学信道,实现数据包信息的单向传输。故项目的核心其实就两部分内容:
- 设计单向传输的数据流
- 图像编解码 & 图像处理
接下来,我就针对这两个课题,聊聊我们的实现思路。
1. 数据流设计
先看看我们的信道条件:
- 相机拍摄屏幕会产生摩尔纹;
- 拍摄过程可能有失焦模糊;
- 相机拍摄可能偏色;
- 相机拍摄存在曝光底噪;
- 拍摄时屏幕光照不均;
- 无法保证拍摄角度完美;
- 视频必有重复帧、可能有漏帧;
- …
显然,在如此恶劣的信道环境下,误码率肯定不容小觑,直接传输 in.bin 的 raw data 是不合理的。必须设计相应的校验与 前向纠错(FEC) 方案。
如果采用非常简单的图像编码设计(比如学长的项目),就能把误码率压下去,从而大胆扔掉冗余设计。但这也意味着单帧图像的信息密度低,传输效率会受到限制。
考虑到误码有更大的可能是因一整块区域“没拍好”所导致的,而非随机的错误,故在众多的 FEC 方案中,我决定使用 Reed-Solomon 编码(QR Code 和 Bar Code 也用了它,相信前人的选择)。这方面有现成的库libcorrect 能用,不需要去手搓算法。ECC 比例根据后续实际测试得到的信道条件来调整即可。
视频的漏帧就是“丢包”,为了应对这种情况,可以使用 Fountain Codes 这种无码率编码方案。Fountain Codes 编码后可以无限发包,接收方只要接收到一定比例的包,即可解出原数据。我们也只要根据实际的“丢包率”调整冗余比例即可。这个也不需要我们手搓,有现成的库 wirehair 能用。
数据包头部加上元信息,指示一些必要的信息。尾部加上 CRC32 校验码,用来检测包是否损坏。损坏的包直接丢弃即可。
如果把校验放到 RS 块里,就能定位出错误块的位置,这样就只需丢这一块,而不必丢掉整个包。这样做看似丢的东西减少了,但我们的传输模型需要改变(图片不再是
此外,in.bin 在编码前,先用 zstd 压一下大小。至于文件名,放进 zstd 的 Skippable Frames 里一起传输即可。
总的编码流程:
%%{ init: { 'flowchart': { 'curve': 'basis' } } }%%
flowchart TD
    %% 分别定义4个不同颜色的半透明背景与描边
    %% 颜色顺序:翠绿 -> 青色 -> 蓝色 -> 深蓝
    classDef step1 fill:#10b98126,stroke:#10b981,stroke-width:2px,rx:10px,ry:10px;
    classDef step2 fill:#06b6d426,stroke:#06b6d4,stroke-width:2px,rx:10px,ry:10px;
    classDef step3 fill:#3b82f626,stroke:#3b82f6,stroke-width:2px,rx:10px,ry:10px;
    classDef step4 fill:#4f46e526,stroke:#4f46e5,stroke-width:2px,rx:10px,ry:10px;

    %% 第三个节点使用
 强制居中换行,防止溢出
    A[Compress with zstd]:::step1 --> B[Chunk slicing
by image volume]:::step2
    B --> C[Reed-Solomon Codes]:::step3
    C --> D[Fountain Codes]:::step4

    %% 连线使用天蓝色
    linkStyle default stroke:#0ea5e9,stroke-width:2px;
解码就是反过来,不赘述。
2. 图像编解码
最无脑的方式就是直接用 QR Code,这方法简单且稳定。
缺点也很明显,信息密度太低(而且还被老师 ban 了)。
我们当然想追求传输更高效的办法。
若像学长的项目一样,只用黑白表示像素点,虽然简单且稳定,但浪费了太多颜色空间。
为了追求更高效的传输,考虑搞一套“彩色二维码”。但要如何最大程度地保证传输后的“彩色马赛克”可被正确识别?
似乎很困难。
所以转换思考方向。单个像素点不易被识别,但有图案的像素块就很容易了。
于是考虑用带颜色的图案单元来编码,并设计相应的解码方案。
设选用的颜色集合
- 共有
种颜色、图案组合,能标识 bits 的信息。 - 信息密度为
bits / ( ) pixels。
先确定一个图案单元的大小,然后通过测试调整
由于uint64_t 类型的数表示,非常方便,所以先取
接下来的讨论,我们都将图案视为
对于待识别图案
如何衡量“相像”程度?那就看它们二进制下不同位的个数,越少说明越相像。
“二进制下不同位的个数” 即信息论中的汉明距离(Hamming Distance)。
反过来思考,为了能区分出
所以对于给定的
实际上,这样构造的
然后,因为我认为零散的点不容易辨别,决定让这些点组成
这个判断只是我的臆断,没有经过任何实验验证。或许“马赛克”真的能提供更大的分辨率呢?
于是,要筛的图案大小就从
接下来再以最大化
我写了一个
pattern_generator.cpp
/* |
测试结果:
| Pattern Count | Min Hamming Distance | Error Tolerance |
|---|---|---|
| 8 | 32 | 15 flips |
| 16 | 32 | 15 flips |
| 32 | 24 | 11 flips |
| 64 | 20 | 9 flips |
上述结果仅供参考(真的有参考价值吗),具体得看摄像头的分辨能力。
然后就是将图案编码进图像中,并测试识别效果。
最开始,我参考了 Cimbar 的设计:图像大小设为
图案的四个角设置
编码区开头放
以下是一个
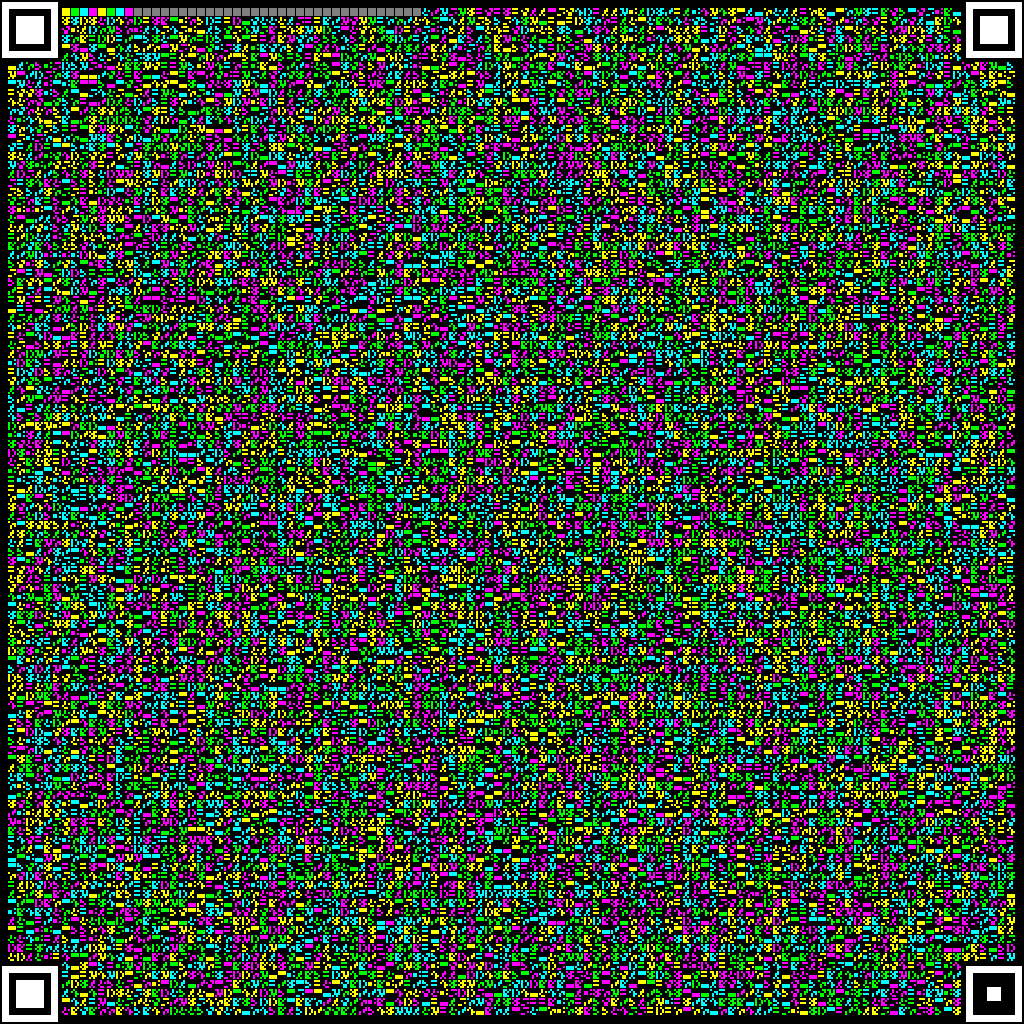
然后对生成的图像做一些模糊处理,看看还能不能被识别。
测试代码如下:
config_acc_test.cpp
/* |
简单的测试,结果如下:
| Configuration | Payload per Frame | Correctly Decoded | Pattern Errors | Color Errors | Accuracy |
|---|---|---|---|---|---|
| 16p 4c | 30900 | 11664 / 12360 | 666 | 32 | 94.37% |
| 32p 4c | 55620 | 11434 / 12360 | 822 | 112 | 92.51% |
| 64p 4c | 105060 | 11016 / 12360 | 1153 | 253 | 89.13% |
| 16p 8c | 37080 | 9209 / 12360 | 1207 | 2035 | 74.51% |
| 32p 8c | 61800 | 8956 / 12360 | 1528 | 1975 | 72.46% |
| 64p 8c | 111240 | 8120 / 12360 | 1215 | 3424 | 65.70% |
从测试结果来看,
图案数暂定为uint64_t 表示,方便),等后续解决了图像定位、识别的难题后再回头调整。
由于上面只是模拟结果,和实际可能有较大出入,所以下一步就是用实际拍摄所得的图片来测试。
接着我就花了
能想到的定位思路有
- 轮廓树检测法,网上搜到的二维码定位算法大多是这个。
- “扫描线法”,这是 Cimbar 的方法,但我没看懂它的代码,所以不敢采用。
- yolov 模型检测,我没用过,所以没去尝试。
- ArUco Marker,使用现有的 Marker 库,感觉很蠢所以先不用。
我觉得轮廓树法挺简单的,就决定用它了。
我所设计的算法流程:
%%{ init: { 'flowchart': { 'curve': 'basis' } } }%%
flowchart TD
    %% 分别定义4个不同颜色的半透明背景与描边
    %% 颜色顺序:天蓝 -> 靛蓝 -> 紫色 -> 玫红
    classDef step1 fill:#0ea5e926,stroke:#0ea5e9,stroke-width:2px,rx:10px,ry:10px;
    classDef step2 fill:#6366f126,stroke:#6366f1,stroke-width:2px,rx:10px,ry:10px;
    classDef step3 fill:#a855f726,stroke:#a855f7,stroke-width:2px,rx:10px,ry:10px;
    classDef step4 fill:#ec489926,stroke:#ec4899,stroke-width:2px,rx:10px,ry:10px;

    A[Image Preprocessing]:::step1 --> B[Find Contours]:::step2
    B --> C[Region Normalization]:::step3
    C --> D[Check Region Type]:::step4

    %% 连线使用柔和的紫色
    linkStyle default stroke:#8b5cf6,stroke-width:2px;
预处理抄 Cimbar,找轮廓抄网上的博客,区域的角度旋转、视角矫正靠 AI,最后的检查用我手搓的唐诗算法。
AI 的检查算法,效果是这样的: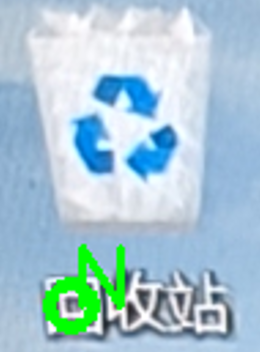
代码如下:
image_parser.cpp
/* |
虽然我搓的 get_roi_type 函数能稳定区分出 Anchor 的类型,但在经过几轮测试和调试后,我发现,网上讲的 findContours(img, contours, hierarchy, RETR_TREE, CHAIN_APPROX_SIMPLE); 这个函数对 Anchor 轮廓的识别成功率不高…
那还说啥了,被网上教程坑了,白忙活了大半天。
好在走了另一条路的 xqy 佬取得了很大的成功:他所训练的 yolov 模型能非常稳定地定位 Anchor。
此外,他还编写了一套 generator 和 benchmark 代码,跑出了一套效果不错的 pattern;手搓了定位后图像的标准化代码,远比 OpenCV 的变换函数高效。
于是,图像编解码的工作就先交给他了。
3. 其它工作
虽然核心问题的解决思路有了,但还有一些细节问题需要处理。
- 数据流编码的数据单位是
bits,但图像编码的数据单位是 bits,需要写一个 bitstream转换器。 - 视频不可避免地有重复帧,对重复帧做图像的
decode是非常浪费计算资源的,可能要用图像哈希算法(如ahash)来判断画面中的图像是否变化。 - 图像的
decode是解码的瓶颈,可能要使用并发技术来提高解码效率。 - 为了实现 Live Decoding,我们可能会用
WASM做一个类似Cimbar Encoder的网站,支持上传文件、编码并显示图像(用电脑),以及摄像头扫描解码(用手机),无需下载安装任何软件。 - 各种测试和参数调整。
预期传输效率
一步一步算。
每帧有
Reed-Solomon 选择经典的
元信息大小为
FPS 选最保守的
达到了大部分限速网盘的水准。
仓库地址
还在施工中。喜欢可以给个 star。
- 标题: Camera-Drop 项目开坑记录
- 作者: Coast23
- 创建于 : 2026-03-05 15:03:40
- 更新于 : 2026-03-05 20:32:03
- 链接: https://coast23.github.io/2026/03/05/Camera-Drop-项目开坑记录/
- 版权声明: 本文章采用 CC BY-NC-SA 4.0 进行许可。